Showing posts with label decorations. Show all posts

Wednesday, November 16, 2011

Deck the Halls...

It's been over a week since my last post as we've been very busy with some personal family matters. To keep my mind off things I've been listening to Pandora's Peaceful Holidays station. This really got me itching to decorate for Christmas.

Here's what I've been up to:

For my kitchen window, I took an old birch tree stick, some velvet ribbon and some ornaments and made a Christmas-y window treatment.

Until we get that faux fireplace figured out, I've decided to just pretend that this area already has a mantel. 

While we are on the subject of Christmas, do your kids believe in Santa? At what age did they stop believing/you told them the truth? How did you break the news?

Tuesday, November 8, 2011

Wall Art for less than $1

I've been slowly, but surely, getting the big girl's room decorated. It would happen a lot quicker if I had an infinite amount of money to spend at PBKids but what's the fun in that?

I made these cute canvas-looking pieces out of items I had around the house plus some 99¢ chipboard letters.

Add caption
Started with some scrap scrapbooking paper, small shoebox lids and a glue stick.


I glued the lid, top down, to the back side of the paper. Then, I started folding in the sides, snipping at the corners with scissors, and gluing to the inside of the lid. Repeating that process on both long sides, then on both short sides.


Folding the "wings" down and gluing into place. (I had to use hot glue for a more secure hold).

Finished and ready for decorating!

I purchased some small chipboard letters at Hobby Lobby and used an old denim iron-on patch I had found with my sewing notions to add texture to the letters. Then, I used hot glue to secure the letters to the "canvas". 


I've really got to get started on the twin's room.

Christmas Wreath


Another inspiration from Pinterest. (I'm completely hooked on that site!) I made this wreath for our front door for less than $5.  Because of the kids, I've retired all our glass ornaments in exchange for safer ones. They've been sitting in the Christmas box for years just waiting to be put to good use again. That's when I stumbled upon this gem on Pinterest.

Using a coat hanger, our old glass ornaments and some velvet ribbon I got at Hobby Lobby for 50% off (90y for $4.49) I made this pretty wreath in about 10 minutes.

Thursday, October 27, 2011

Lamp Gets a Facelift

 This is a brass lamp my mother had given me a few years ago. (My mom has a lamp fetish and has tons of them. I don't think I've ever actually purchased a lamp. Ever.)  To be terribly honest, I can't stand brass (Sorry, mom!) and today I decided to finally do something about it.  I spray painted the lamp a "hammered steel" gray from Rustoleum.


Using ONLY what I had on hand (because, well, I'm cheap resourceful!) I made a lampshade. I took cardstock, taped end-to-end, and hot-glued around the base of the existing lampshade.

 Here it is with the cardstock hot-glued around the bottom of the existing shade. Now, to snazz it up.
This step took FOREVER. Using coffee filters, I hot-glued them in a brick-laying pattern covering the entire shade. 
 Several hours, and a few diaper changes for the twins, later.
Here it is in our living room. I think it looks great! Now, I've got it on my to-do list to repaint that awfully drab looking table. Teal, maybe?

Monday, October 10, 2011

Mr. Spooky Ooky

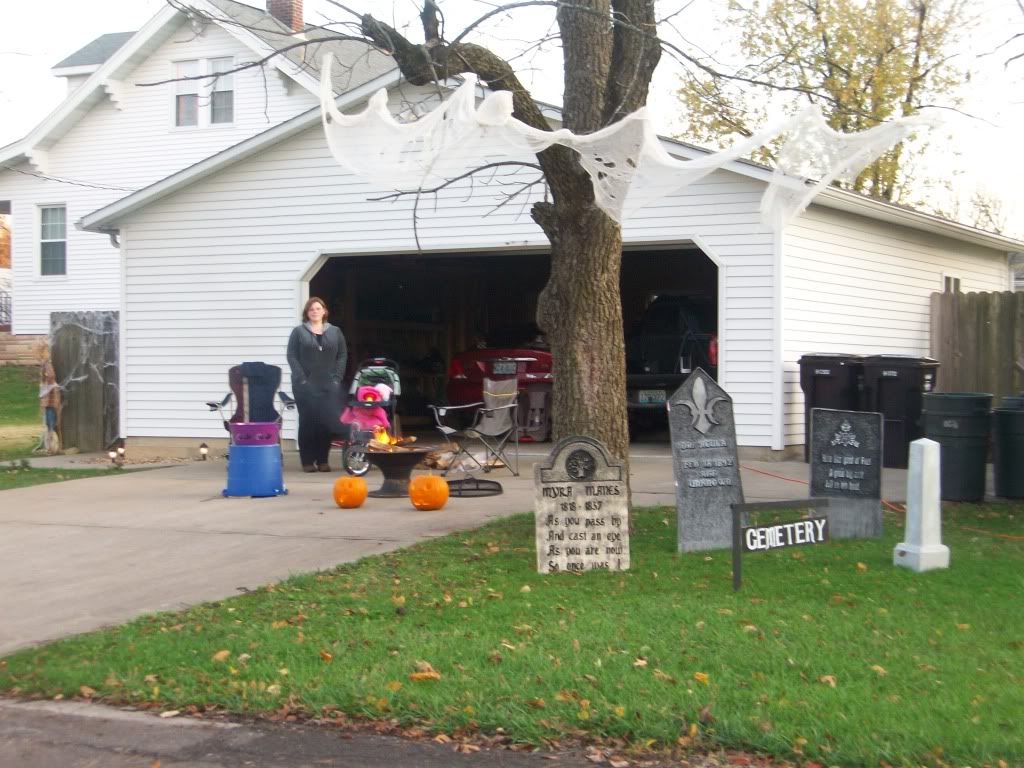
Prior to the twins, I had these things called time and energy. I had made these tombstones out of large sheets of Styrofoam insulation, a Dremel, and various paints.
It was a long, messy project that took weeks to make three.


This was our first Halloween in our first home. You can see the 3 gravestones I made and the monument (far right) that Super-Hub made.


We also made our first Mr. Spooky Ooky. He's a Styrofoam manequin head purchased from Hobby Lobby, some chicken wire, a broom stick, some zip-ties and old sheets. First Mr. Spooky Ooky was stolen directly from our side yard. We had him lit up with a blue spotlight that made him appear to glow in that creepy "night vision" green color.

Last year we didn't make a new one - too sleep deprived from the twins - but this year we made Second Mr. Spooky Ooky and attached him securely to the front porch. :) We live on a busy street and enjoy watching people drive by look at him since he looks very real.

I am easily amused.